So here we go.
You will need:
Scissors
Elastic --3/4" Knit Elastic (or whatever you prefer)
Tulle -- One or more colors (as many colors as you want)
Needle and Thread
Tape Measure

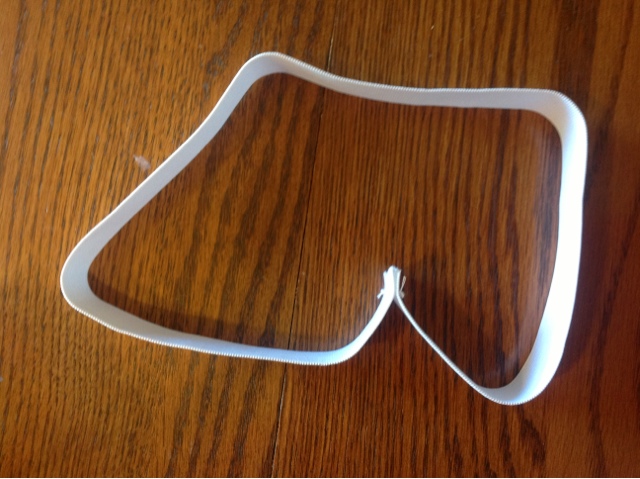
I started by measuring my little, almost-one-year-old girl's waist. She measured 18.5in around. I cut the elastic to size, and sewed the ends together. I sewed about a quarter inch from the edge, so the elastic will end up at 18in around. You can do a quick stitch with the sewing machine, or just sew by hand. Easy either way!

Next, you cut the tulle. Here is how to figure out how much tulle you need:
Measure how long you want the tulle to be on the child (start from waist). I want mine to be 8 inches. You then double that number, because the tulle will be folded in half. Mine becomes 16 inches. Then you add 1 inch for the knot. So, the length of my tulle becomes 17 inches.
The spool of tulle I bought was 15 yards. I used the entire spool for the tutu. Don't worry about cutting all of the pieces of tulle EXACTLY the same length, but try to get them pretty close.
Time for the knotting. First, make sure to turn your elastic to where the extra "edge" faces in:
Then, take a piece of tulle and fold it in half to make a U:

Stick the bottom part of the "U" to the inside of the elastic:

Fold the ends of the tulle down over the front of the elastic (the U stays behind the elastic:

Tuck the ends of the tulle through the U:

And pull the ends of the tulle downward while pushing the "U" up towards the elastic:

Be sure not to make the knot too tight. You don't want your elastic to fold up.
Here is what it looks like after the first couple of knots:


Repeat the knots until you have gone all the way around the elastic:

 Trim up any long ends if needed and.....
Tada! You have made your tutu! Be proud!
**Just a few other tips and suggestions**
~If you spread the tulle out over the elastic it looks better at the end
~You can put a little ribbon bow on by sliding the edge of a ribbon through one of the knots and then tie a bow!
~For multi-colored tutus, simply cut different colors of tulle and alternate the colors around the elastic!
~If you made a pile of tulle it is good to pull from different areas of the pile as you go along, that way if there are any varying sizes of tulle, they will be mixed up well throughout.
Glittery tulle users, BEWARE! The glitter gets EVERYWHERE!!!!
